Pages

Tuesday 18 April 2017

Guest project from Shazlyn Designz


Here is a fabulous project using the Sheena Douglas Time Traveller stamp available from the Fave Rave shop.

First I stamped the image onto white card using black ink

Then I stamped on pieces of scrap patterned paper then paper pieced them on top of the blank stamp an glued the in place..

And finished just background to do..


Then made back ground..using Tim Holz distress inks and a PaperArtsy dandelion clock stamp again all available in the Fave Rave shop


 Finished project..if u have any questions feel free to ask and I hope you enjoyed my first blog. Lots of love to everyone and come play with us at Fave Rave soon. Sharon ❤💖💖💖

Thursday 25 August 2016

Imagination Craft's Rusty Patina

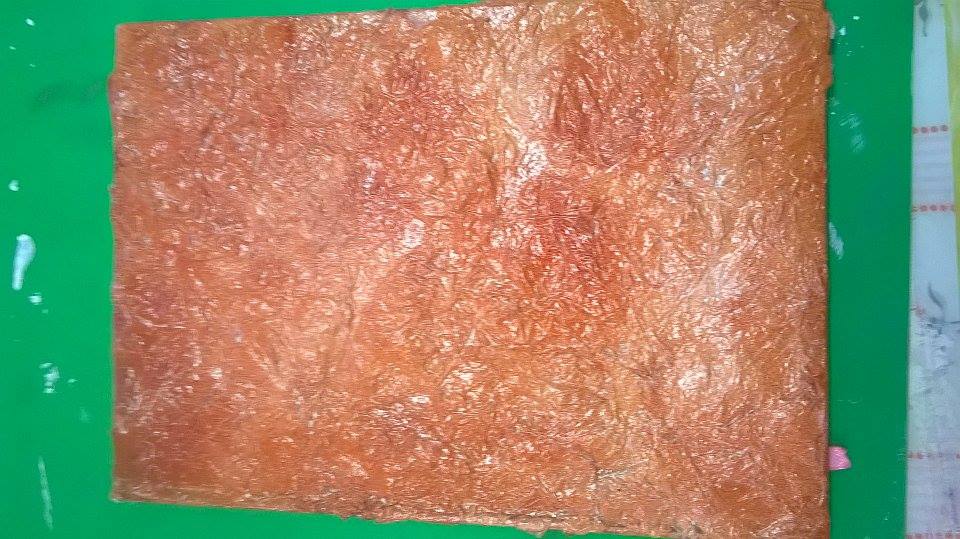
Hi All You Fave Rave Bloggers out there, here is a brand new product we have just had delivered. I have to say I'm hooked already, with  Imagination Crafts New Rusty Patinas


And here's what I did using three of the colours that I chose to use. I took any ordinary glass bottle to decorate, although you can use it on many surfaces including card, MDF, Journals Glass Bottles Clay, Frames and much more, and it adds a beautiful textured, distressed or vintage feel to you piece.


Using the Rustique colour and a piece of sponge I used a dabbing technique to cover all round the outside of the bottle

As this dried (and it dries very quickly) I chose some embellishments including paper and card and wax cord for decoration which I also painted ( this time with a brush) with the Rustique


I then started to build up the layers of colours to give the final effect. I used the Verdigris and sponge (using the same dabbing technique) in random areas on the bottle and the embellishments 


 Once dry, I did the same with the Blanc


The combination of these colours gives a fabulous rusty effect
Finally once dry I added the embellishments with crafters glue and here is my final result, I am so pleased with it, as its the first time I have used it


I'm sure you will love these Rusty Patina's they come in six colours (Soot, Rustique, Duck Egg, Cafe Creme, Blanc and Verdigris) and are so easy to use with a sponge or paint brush, with endless possibilities as you can blend the colours together to give lighter or darker tones and of course you can get them from our shop Fave Rave


Saturday 14 May 2016

Easy Dot Painting Arts & Crafts Ideas - all products in stock at Fave Rave


____________________________________________________________________________

An easy, low-cost alternative to button art

You will need:
For design work, you have the following options:
  • Graphite paper to transfer a design or words that you like (like the ballerina on the right)
  • Silhouettes to use as a template and dot around (like the white heart canvas above)
  • Stickers to use as a template to dot around
  • Free-hand (if you are good at drawing)

Heart Silhouette Instructions

We've shown two versions:  (1) plain white canvas with pink dots and (2) a black dot canvas with gold dots.
  1. We used the A4 white pre-primed canvas for both options.  For the black version we simply painted the canvas with Americana Black Ebony paint.
  2. Place the Heart Silhouette in the centre of the canvas.
  3. Using a Dotting tool, rubber on the end of a pencil or cotton buds/Q-tips (or a combination of them all), dot around and close to the silhouette.  One hand will need to keep the silhouette in place; the other hand will do the dotting.
  4. Gently remove the silhouette making sure you do not smudge the wet paint.  Wash the silhouette immediately.
  5. Whilst the dots are wet you can sprinkle them with Glamour Dust Dry Glitters - a fine dry glitter (Gold or Crystal).
  6. Spray Varnish with matte or gloss for added protection or durability (optional).

Four Seasons and Ballerina Canvas

  1. Find patterns (branch or ballerina) online by searching for FREE printables. Save the pattern and print it (on a standard printer with standard/copier paper) making sure the pattern is the appropriate size for the canvas.
  2. With the four seasons canvases we chose an assortment of colours and painted over the A4 white pre-primed canvas.  For the black ballerina version we simply painted the canvas with Americana Black Ebony paint.
  3. After the paint has dried, use graphite transfer paper to trace the pattern onto the canvas, or if you are comfortable with it, free-hand the design on lightly with a pencil.   White graphite paper works on a dark background; grey graphite paper is used on a light background.  To use place the graphite paper transfer side face-down on the canvas.  Next place your artwork on top making sure it is in the correct position on the canvas (top tip:  sometimes it is easier to place the artwork in position and slide the graphite paper underneath).
  4. Trace around the artwork using a dotting tool, pencil or pen (hold the papers in place while you trace - it maybe worthwhile checking the that artwork is transferring i.e. you have got the graphite paper the right way round before you finish all the tracing).
  5. For the ballerina will filled in her silhouette by using the dotting tool dipped in various pinks and whites.  For the four seasons assortment, we painted a black branch and then randomly dotted around the branches in assorted colours.
  6. Don't forget that graphite papers are re-usable - just keep using until you notice that the artwork is not transferring as well as you need.
  7. Whilst the dots are wet you can sprinkle them with Glamour Dust Fine Dry Glitter (Gold or Crystal).
  8. Spray varnish with matte or gloss for added protection or durability (optional).
Using Deco Art Image Transfer From Country Love

Tuesday 5 April 2016

Happy Quickie

Hi Fave Ravers

Felm and I are are in a happy mood having just booked our latest road trip, and at the end of April we will be off to Jersey. So here is a little quickie  to remind you butterflies are on their way


Started with a blank piece of watercolour card and gave a few shake of Brushos and a few shakes of Pixie Powder (for the metallic sheen) then I sprayed the page with water, adding more shakes of colour if I felt it necessary. When it was dry I selected the part I wanted and cut it to size to match the embossing folder, a quick whiz through the embossing machine and we were nearly there. Finally using a blending tool I put a small amount  of Silver Alchemy Wax onto the sponge and worked it in a little and gently ran the sponge over the embossed parts to give me a gentle sheen. All it needs now is matting and layering onto the card and a quick and easy card is ready.

And another one I did earlier from the same background watercolour card


Happy crafting till next time

Irene

Saturday 26 March 2016

Step by Step Book Cover

Hi everyone , hope you bear with me on this, it is my first blog!!!
This is our finished book cover, we hope you like it and enjoy trying it for your self

The finished article

Next the list of materials you need
Tissue paper (we rescued this from the packaging in a box, love freebies), Archival ink refill in Sienna,Deco Art Decoupage glue, Deco Art white crafters acrylic, Deco Art metallic paints in Splendid Gold and Copper and Deco Art Antiquing Cream Patina Green and of course a book.We used an old out of date diary and lighted sanded the cover to give a little tooth or key.
Tear up the tissue paper into irregular shaped pieces between 2 and 3 inches in size and using the Decoupage glue tissue paper to cover all the front of the book.Some pieces we scrunched more to give a varied texture
Leave to dry and then paint a cover of the white acrylic paint.Leave to dry and add one more coat of glue and again leave to dry.Or if like me you have no patience, get out your heat gun or hair dryer


Then using a blending tool and your Sienna ink coat the whole of the cover


When this has dried take your antiquing cream and rub in (i used my fingers) in random areas


Leave this to dry and then take a baby wipe and gently rub back the antiquing cream until you are happy with the effect
Final stretch now, take your metallic paints and using a dry brushing technique add highlights to your cover until you are happy with the effect


And one stunning book cover completed. Hope you enjoyed my first post and hopefully i will get better. Love you all

Tuesday 16 February 2016

Welcome to our Blog!

Fave Rave is now in Blogland - follow us for the latest news, offers, workshops and more!